This article provides general information about navigating your Veeva Basics applications.
Tab Collections
You can access the tab collections from the Tab Collections menu in the upper-left corner of your Veeva Basics application:
The tab collections available to you, and which tabs are available in those tab collections, are dependent on the Veeva Basics application and the security profile assigned to your user account.
Notifications
Notifications provide a way for Vault to let you know when certain events have occurred. These notifications may be related to documents, workflows, or other record activity, and may contain helpful links for easy navigation to the relevant location in Vault.
When you receive a new notification, a solid notification dot is displayed on the Notifications icon in the upper-right corner of any Veeva Basics page.
Using the Notifications Panel
The Notification panel displays the 25 most recent notifications that you’ve received.
Complete the following steps to use the Notifications panel:
- Click the Notifications bell icon to open the Notifications panel. Vault displays new notifications with a notification dot and unread notifications with a blue background.
- To mark a notification as read, hover over the notification and click Mark as Read. The notification background changes to white.
- To delete a notification, hover over the notification and click Delete. The notification is removed from the Notifications panel.
- If a notification is related to a specific document or other record, click the record name in the notification to navigate to the related document or record.
- To view more details about a notification, click Show more in the notification. The notification is expanded and displays additional details.
Using the Notifications Page
The Notifications page displays all of your notifications and the full notification text for each notification. You can filter your notification list using the following views in the left panel on the Notifications page:
- All Notifications: Displays all notifications, regardless of category.
- Tasks: Displays notifications related to tasks.
- Shared Views: Displays notifications when another user shares a filtered view with you.
- Send As Link: Displays notifications when a user sends you a link to a document using the Send As Link action.
Complete the following steps to use the Notifications page:
- Click View all in the upper-right corner of the Notifications panel to open the Notifications page.
- Click the Reverse sort direction arrow button to sort your notifications in chronological or reverse chronological order.
- If a notification is related to a specific document or other record, click the record name in the notification to navigate to the related document or record.
- To mark an individual notification as read, hover over the notification and click Mark as Read. The notification background changes to white.
- To mark all notifications as read, select Mark All as Read from the All Actions menu.
- To delete an individual notification, hover over the notification and click Delete. The notification is removed from the Notifications page.
- To delete all notifications, select Delete All Notifications from the All Actions menu.
All Actions Menu
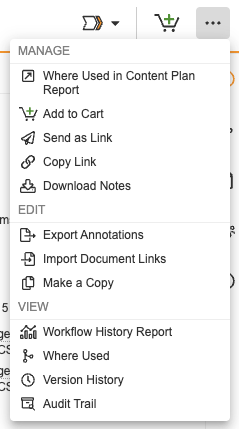
You can access various actions from the All Actions menu available in the upper-right corner of your Veeva Basics application.
Actions in the All Actions menu are divided into the following categories: Manage, Edit, Download, and View. Each category contains a list of actions that you can perform on the selected document or record. The actions available to you in the All Actions menu vary by Veeva Basics application and the security profile assigned to your user account.
Workflows & the Workflow Actions Menu
A workflow is a series of steps in Veeva Basics to align with specific business processes. These steps are actions that occur in relation to a document or other type of record. The different step types within a workflow can perform a wide variety of processes for Vault content, such as assigning tasks to users, sending notifications, and changing a record’s lifecycle state. For example, an Approval workflow assigns you a task, allows you to choose a verdict (such as Approve or Reject), allows you to enter a reason for your verdict, and then automatically updates the associated record based on your selected verdict.
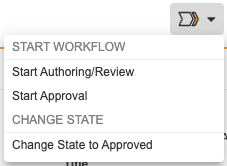
You can start workflows by selecting the appropriate action from the Workflow Actions menu in the upper-right corner of your Veeva Basics application.
The actions available to you in the Workflow Actions menu vary by Veeva Basics application, the selected record type and its current lifecycle state, and the security profile assigned to your user account. While the Workflow Actions menu allows you to start a workflow for a single record, the Cart allows you to start a workflow for multiple records at the same time.
Cart
With Cart, you can quickly create an ad hoc group of documents from multiple filter sets and Library views. From your Cart, you can download source files or viewable renditions, start workflows, or initiate bulk document actions such as Edit Fields and Change State.
The Cart button in the upper-right corner of your Veeva Basics application displays a count of how many items are currently in your Cart. Click the Cart button to view items you’ve added to your Cart.
Adding and Removing Items from your Cart
To add a document to your Cart, open the document and click Add to Cart ( ) in the upper-right corner of your Veeva Basics application. To remove it from your cart, click Remove from Cart (
 ).
).
Performing Bulk Actions in Your Cart
Complete the following steps to perform bulk actions for the items in your cart:
- While viewing your Cart, select All Documents in the Perform Bulk Actions section of the All Actions menu.
- On the Refine Selection page, deselect any documents you want to exclude from the bulk action. Click Next.
- On the Choose Action page, click Calculate Permissions next to the action you want to perform. Vault displays information regarding how many of the selected documents will be affected by the action based on your permissions.
- Select the action you want to perform in bulk and click Next.
- On the Step 3 page, enter the necessary information or make the appropriate selections according to the action you selected and click Next. The information you need to enter or select varies depending on which action you selected.
- On the Confirmation page, review the summary of the bulk action and click Finish to initiate the action. Once the bulk action is complete, Vault displays a confirmation message in your Notifications panel.
Library Tab
The Library tab in each Veeva Basics application allows you to view and manage your organization’s documents.
Library Tab Views
Select the following views on the left panel in the Library tab to see documents available to you:
- All Documents: This view displays all documents that you can access.
- Recent Documents: This view displays documents that you have recently viewed.
- My Documents: This view displays documents that you own or have checked out.
- Favorites: This view displays documents that you have added as a favorite by clicking the star icon next to the document name.
Library Tab Layouts
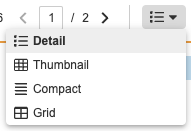
Vault offers four different layout options in the Library tab: Detail View, Thumbnail View, Compact View, and Grid View. Use the Layouts menu to switch between views. Once you’ve selected a layout option, Vault remembers it until you select a different layout.
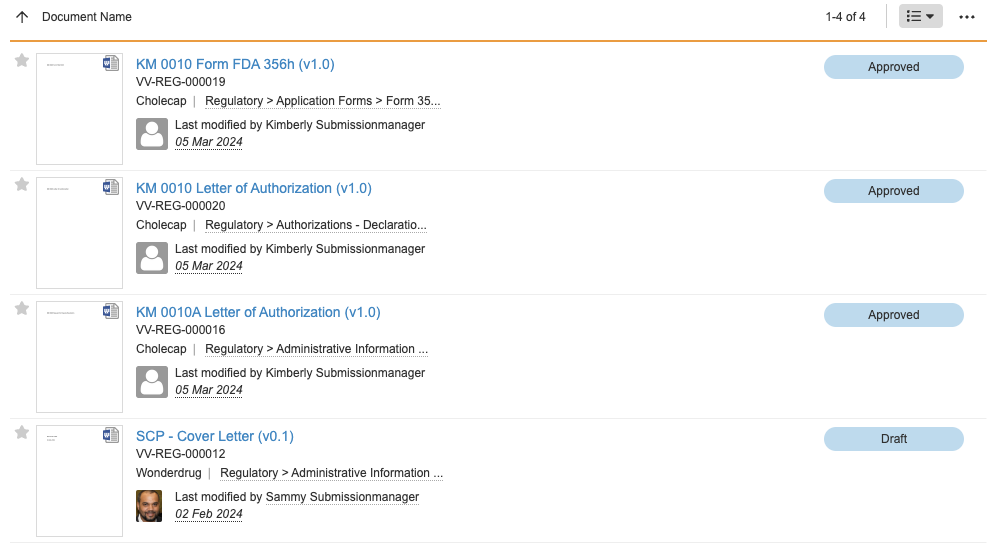
Detail View lists documents in rows. Each row shows a thumbnail of the document and important document fields:
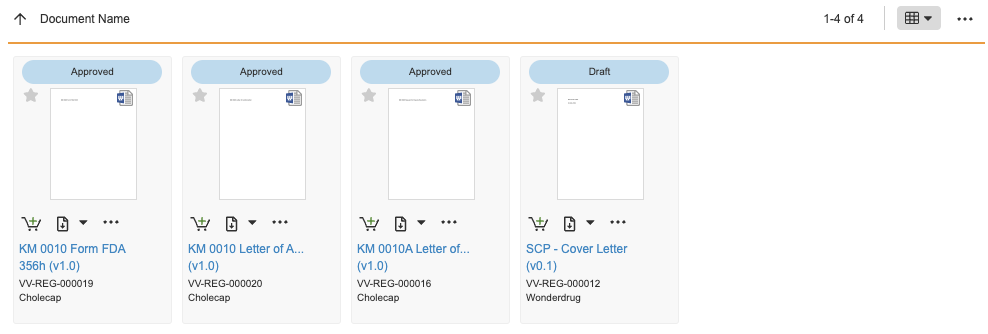
Thumbnail View organizes documents into columns and rows. Each tile shows the document thumbnail and important document fields:
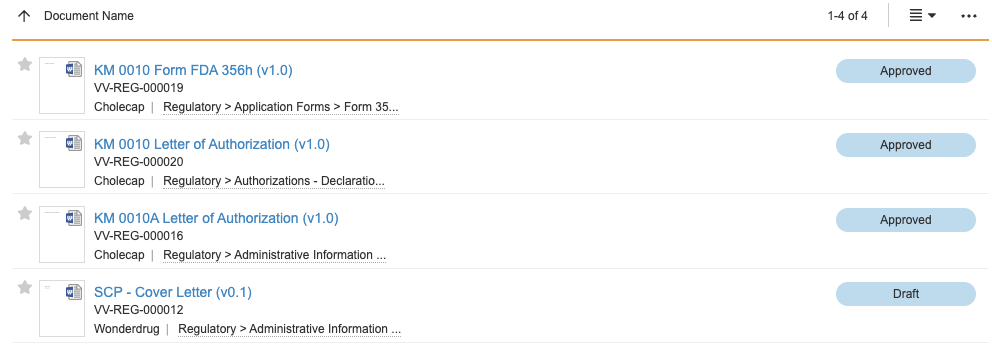
Compact View organizes documents into rows and displays a small thumbnail:
Grid View functions like a spreadsheet. You can rearrange or resize columns, add custom columns, sort by column values, and export your document metadata:
Using the Library Grid View
The Library’s grid view functions like a spreadsheet, allowing you to sort your documents, resize columns, modify which columns appear, and more. When you hover over a document name in the grid view, Vault displays a preview and information about the document. The following features are available in the grid view:
- Sorting: Sort by any column in ascending or descending order. To sort, click the column heading. The first click sorts the column in ascending order, and the second in descending order.
- Resizing Columns: Resize the width of a column by dragging the edges of the column heading.
- Rearranging Columns: Change the order of columns by clicking and dragging the column header to a new location. You cannot move the Name column.
- Adding or Removing Columns: To add or remove columns, select Edit Columns from the Actions menu. In the dialog, move the columns you want from the Available Columns list to the Selected Columns list using the arrow buttons. To reset all settings to the default, click Restore.
- Truncate or Wrap Text: Select Truncate Cell Text/Wrap Cell Text from the Actions menu to toggle between truncating (showing only the first part of the text) and wrapping (showing any characters that don’t fit on a second line) text that is too big to fit in its column.
- Freezing Columns: Select Freeze Column from the Actions menu to enable column freezing, then drag the blue line to select which columns to freeze. Select Unfreeze Column from the Actions menu to unfreeze the columns.
- Exporting: Select Export to CSV or Export to Excel from the Actions menu to download the fields in your current view in CSV or XLSX format.
Searching Vault
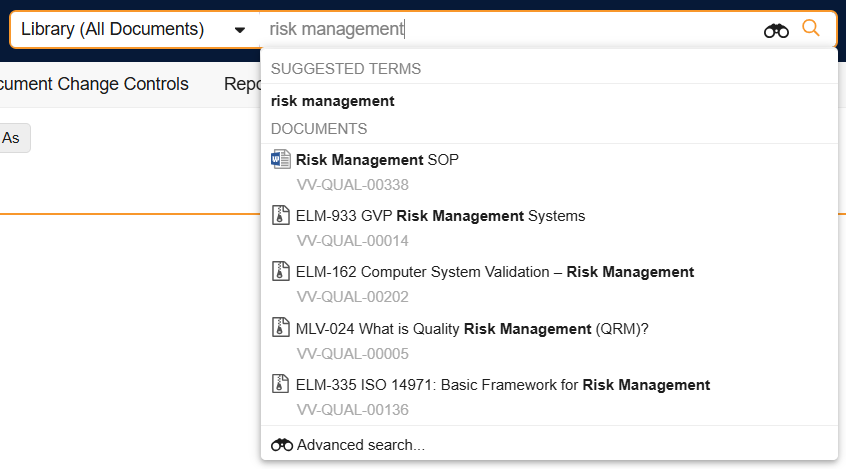
Vault uses a powerful search engine to help you find documents, object records, and attachments. You can perform a Basic Search from the primary search bar, or carry out more detailed searches using Advanced Search.
How to Use Basic Search
Basic Search allows you to perform a simple search within document or object record fields.
To perform a Basic Search:
- In the search bar’s drop-down menu, select the documents or objects you want to search. These align with the custom tabs in your Vault.
- Click into the search field in the primary navigation bar. The most recently viewed documents or object records will display automatically. If you’re looking for one of these, click on it from the preview list. If not, continue with the next steps.
- Start typing one or more terms in the search box. To search an exact string, use double quotes around the terms (e.g. “patient education”).
- Choose a document or object record from the preview list, press Enter to see all results, or click Advanced Search to perform a more complex search.
-
From the search results page, click on the document or object record name to view it.
If your search found too many results, use the filters on the left to narrow down the list.
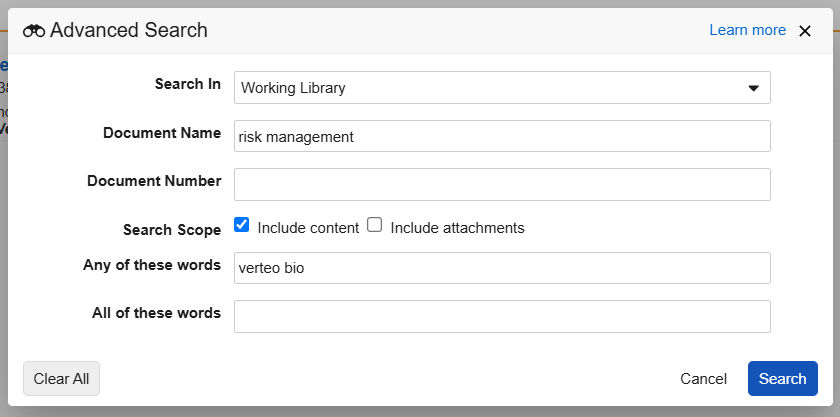
How to Use Advanced Search
Advanced Search allows you to perform more complex searches for documents by searching within specific fields, including attachments, changing the search operator, and searching within document content.
To use Advanced Search:
