Admins have sole responsibility for user management in Veeva Clinical Basics. These tasks can be subdivided into two categories: Setup and System Maintenance.
Before users can access your Vault, you must complete the following setup tasks:
- Creating and Managing Users
- Setting up Studies
- Granting Study Access
In addition to the setup tasks, Admins also have responsibility for basic system maintenance:
- Managing the Global Directory
- Archiving Studies
Note: In order to create and manage users in the domain, you must have the Vault Admin Security Profile.
Vault has three user types:
- Domain users: Typically employees within your company. These users may already be in your company domain.
- Cross-domain users: Typically users from external organizations, such as vendors or inspectors. These users already have Veeva Vault credentials and will use them to access your Vault.
- VeevaID users: VeevaID is an Identity Provider (IdP) system that allows you to use a single login for all Veeva applications. Users with a VeevaID can use their SSO credentials to access Vault.
Overview of Account Type, Security Profile, and Person Type
Account Types for Veeva Clinical Basics: eTMF
| Account Type | Permissions | Security Profile | Person Type |
|---|---|---|---|
| Vault Admin | All permissions of the Study Contributor, plus:
|
Vault Admin | Internal |
| Study Contributor | All permissions of the Study Viewer, plus:
|
Study Contributor | Internal or Vendor (if CRO User) |
| Study Viewer |
|
Study Viewer | Internal or Vendor (if CRO User) |
| External Inspector |
|
External Inspector | Vendor |
Account Types for Veeva Clinical Basics: CTMS
| Account Type | Permissions | Security Profile | Person Type |
|---|---|---|---|
| CTMS Vault Admin | Combination of Vault Admin role plus Study Manager role permissions.
This account has global access to all documents and data, and is not restricted by study. |
CTMS Vault Admin | Internal |
| Study Manager | All permissions of the Monitor, plus:
|
Study Manager | Internal or Vendor (if CRO User) |
| Monitor | All permissions of the Study Contributor, plus:
|
Monitor | Internal or Vendor (if CRO User) |
| Study Contributor | All permissions of the Study Viewer, plus:
|
Study Contributor | Internal or Vendor (if CRO User) |
| Study Viewer |
|
Study Viewer | Internal or Vendor (if CRO User) |
| External Inspector |
|
External Inspector | Vendor |
Creating New Domain Users
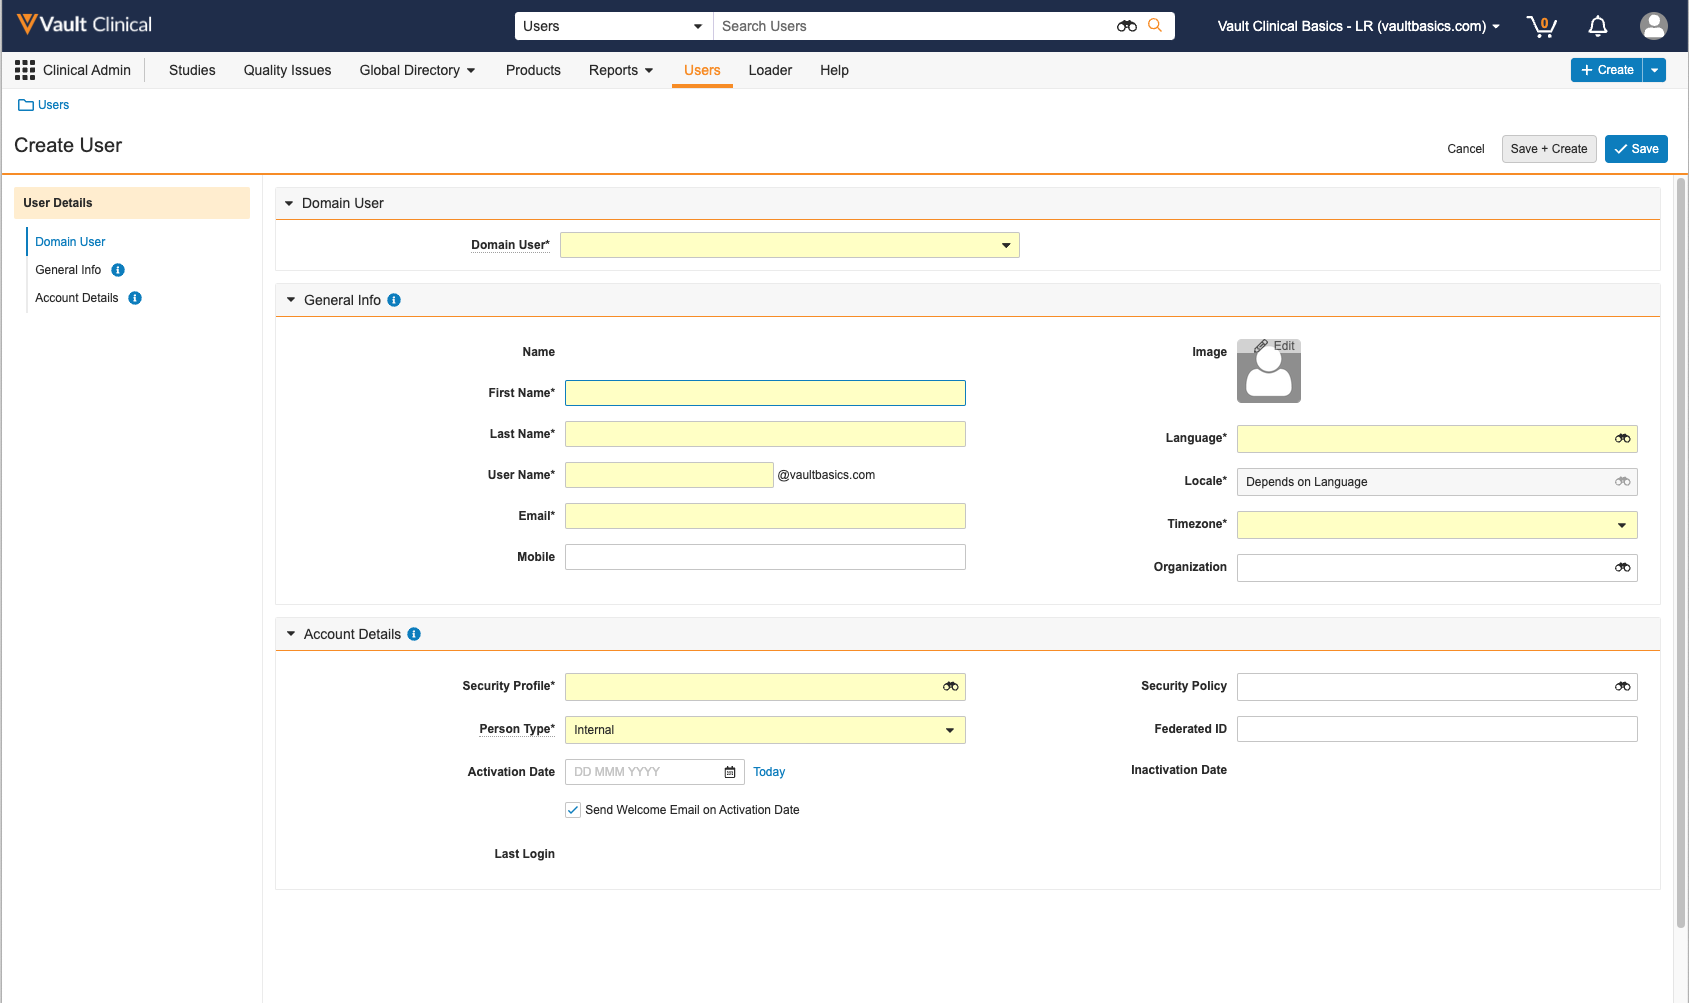
Complete the following steps to create a new Domain user or add an existing Domain user to your Vault:
- Open your Clinical Vault.
-
Navigate to Users > Create. The Create User page displays.
- Click Domain User under User Details.
- In the Domain User field, begin typing the user’s email address. A dropdown list displays:
- If the user is a part of your Domain, select them from the list.
- If the user is not a part of your Domain, click Create Domain User and enter their information in the pop-up window. Click Save. The system populates all known information in the General Info and Account Details sections.
- Enter any contact information that has not been populated by the system.
- The Grant User Access section includes a list of available profiles. Select the appropriate Security Profile for the user and enter it in the Account Details section.
- Select the appropriate Person Type for the user.
- Select the desired Activation Date.
- Click the Send Welcome Email on Activation Date checkbox to ensure that the customer receives an email notification of their access.
- Set the Security policy associated with the user:
- Basic (non-SSO)
- Required SSO
- Click Save to save the user in the Vault.
Activating and Deactivating Users
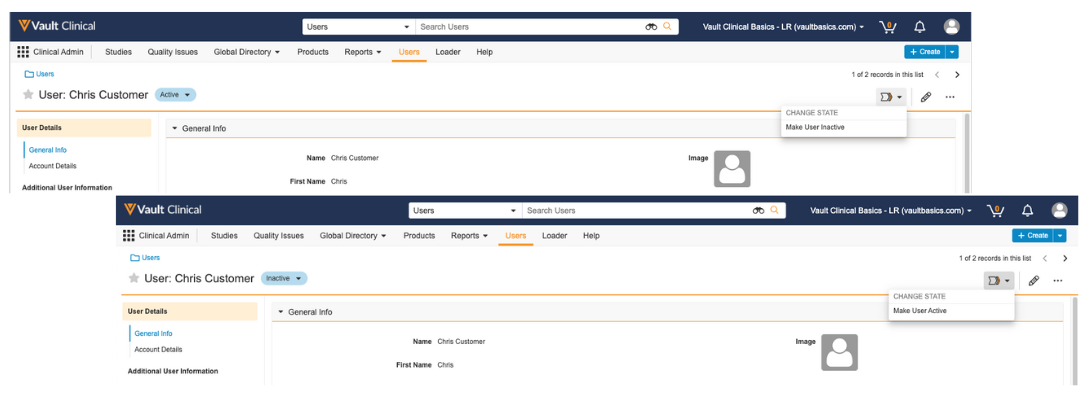
Use Change State to set users to Active or Inactive in the System.

